Install and Setup Quickstart
Install and set up Reseed in your Snowflake account. This guide is for the person performing the installation. Complete in about 10 minutes.
Prerequisites
Before you begin, ensure you have:
- A non-trial Snowflake account on AWS or Microsoft Azure (commercial regions only)
- The
ACCOUNTADMINrole or privileges to install Marketplace apps. Reseed requires theCREATE DATABASEprivilege, which is automatically granted with manifest version 2 during installation. - A spreadsheet file to upload (Excel .xlsx, Google Sheets export, or CSV)
Reseed uses hybrid tables internally. If a cloud or region doesn't support hybrid tables, then it can't benefit from Reseed. Unfortunately, hybrid tables are not supported by Google Cloud, U.S. SnowGov Regions, or trial accounts. For details, see Snowflake's hybrid table limitations.
Step 1: Install Reseed from the Marketplace
-
Go to the Reseed listing on the Snowflake Marketplace.
-
Click Get to begin installation.
-
Choose the database name for the application (default:
RESEED). -
Select the warehouse to use during installation.
-
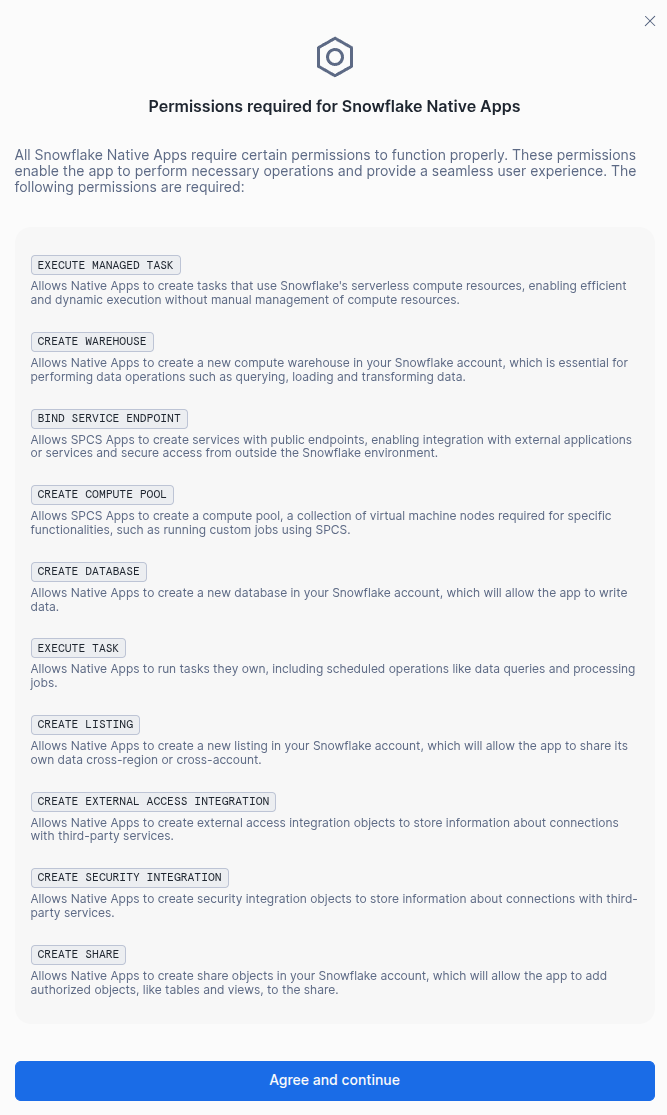
Approve the installation. Reseed requires only the
CREATE DATABASEprivilege, which is automatically granted with manifest version 2. You may need to acknowledge that some applications will be granted privileges automatically during install—these privileges are always explained on the app's marketplace page ahead of time. -
Click Get to complete the installation.
Installation typically takes 1-2 minutes. During installation, Reseed automatically:
- Requests the
CREATE DATABASEprivilege (automatically granted with manifest version 2) - Creates a dedicated database (
RESEED_DATA) - Creates schemas, views, optional materialized tables, and an internal stage
- Sets up all core objects required for the app to function
Reseed creates a self-contained workspace in your account:
- RESEED — The application database that exposes stored procedures
- RESEED_DATA — A dedicated database containing:
RESEED_DATA.ACTIVE— Current views and optional materialized tables for query-ready dataRESEED_DATA.HIST— Historical views for all validated files, including outdated versionsRESEED_DATA.CORE— Internal stage and application tables
No manual SQL is required to install the app or begin using it as an administrator. Once complete, you'll see Reseed in your Apps section in Snowsight.
Step 2: Open Reseed
Click Open to launch the Reseed interface. The app is ready for the owner to use immediately; the application role setup for other users comes next.
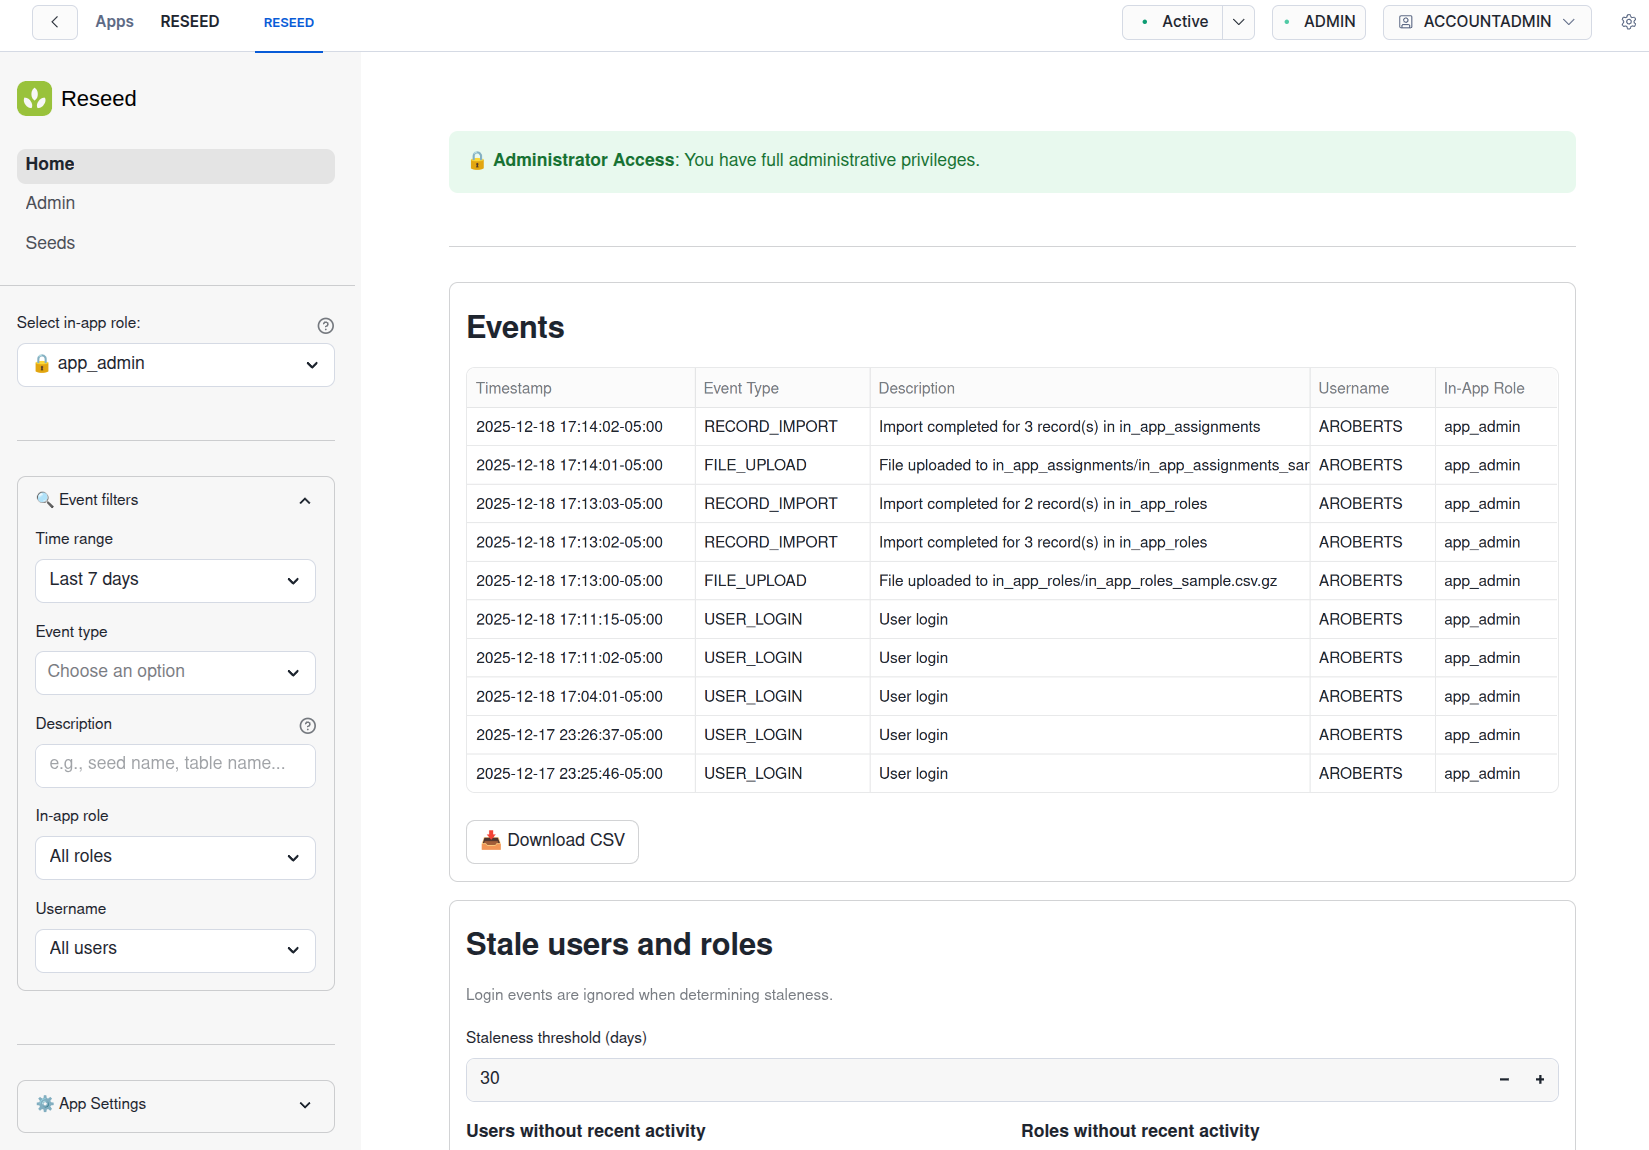
The page navigation in the top left sidebar provides access to the app's pages:
- Home — Your personal dashboard showing recent actions. If you're an
app_admin, you can view and filter events for all users, and see lists of users and in-app roles with no recent activity. - Admin — (
app_adminonly). Here you can set up and manage in-app roles and user assignments. - Seeds — The primary workspace where you upload files, interact with existing files, and create or manage Seeds (the patterns and rules that govern file uploads). Available to both administrators and users. Sample seeds are included for learning:
sample_budget_requestsandsample_row_level_security_map.
Only the role that performed the installation (usually accountadmin) currently has access to Reseed. This role is considered the "app owner". By default, this role has access to all application roles used by the app. To allow other users to access Reseed, you'll need to grant them the appropriate application roles (Step 4 below).
The installing role (often ACCOUNTADMIN) is the app owner. This role automatically inherits all application roles and can uninstall the app. Because Reseed creates the RESEED_DATA database, if you want to remove the app later, transfer ownership of the database and its objects to another role first. Do not run DROP APPLICATION RESEED CASCADE, which would drop application-owned objects and delete the data.
Step 3: Grant Application Roles
Reseed uses two application roles to control access to the app:
RESEED.APP_ADMIN— Manages Reseed's internal setup: in-app roles, user assignments, and system configurationRESEED.APP_USER— Uses Reseed to upload files and (optionally) create and manage Seeds
You can grant these application roles to existing Snowflake roles, or create dedicated roles for Reseed. Below we show an example of creating dedicated roles, but you can also grant the application roles directly to any existing Snowflake roles.
USE SECURITYADMIN;

-- Create a role for Reseed administrators
CREATE ROLE IF NOT EXISTS RESEED_APP_ADMIN;
GRANT APPLICATION ROLE RESEED.APP_ADMIN TO ROLE RESEED_APP_ADMIN;
GRANT ROLE RESEED_APP_ADMIN TO ROLE SYSADMIN;

-- Create a role for Reseed users
CREATE ROLE IF NOT EXISTS RESEED_APP_USER;
GRANT APPLICATION ROLE RESEED.APP_USER TO ROLE RESEED_APP_USER;
GRANT ROLE RESEED_APP_USER TO ROLE SYSADMIN;
Best Practice: If an administrator will also use Reseed as a normal user (uploading files, managing Seeds), consider granting them a separate Snowflake role with only reseed.app_user for day-to-day work. This follows the principle of least privilege—just as you wouldn't log into Snowflake always as ACCOUNTADMIN if you often perfrom ANALYST tasks.
Reseed runs well on an XSMALL warehouse. Individual actions in Reseed are simple and don't require large warehouses. If users experience lag, it's typically due to concurrency—multiple users competing for resources. In these cases, consider scaling out (enabling warehouse clustering) rather than scaling up to larger warehouse sizes. Clustering allows multiple compute clusters to work in parallel, which is often more cost-effective than a single larger warehouse.
Reseed is now installed and set up in your Snowflake account. You've successfully completed the quickstart!
Suggested Next Steps
Now that Reseed is installed, here are the recommended next steps:
Reseed includes sample seeds for learning: sample_budget_requests and sample_row_level_security_map. Open the Seeds page, enable Seed Admin Mode, and clone a sample seed to explore configuration options and validation behavior. You can safely upload invalid data to observe validation errors.
Grant application roles to users and set up Reseed's internal role system for access control.
Learn how to create and configure Seeds—the patterns and rules that govern file uploads.
Step-by-step guide to uploading Excel files, CSVs, and Google Sheets exports to your Seeds.
Browse all available guides covering validation rules, use cases, and more.
Questions, feedback, and feature requests are always welcome at support@reunionstudio.io.