Creating Seeds
Seeds are the foundation of Reseed. Learn how to create, clone, and configure Seeds—the patterns and rules that govern file uploads.
What is a Seed?
A Seed is a data source definition in Reseed. It defines the expected structure of incoming files—columns, data types, validation rules—and who is allowed to submit or view them.
Think of a Seed as a bouncer at the door. It's alert, fair, and helpful—but firm. Every spreadsheet is checked before it gets in. If something doesn't meet the rules, it's stopped at the door with a clear explanation of why. If it passes validation, it's welcomed inside knowing the environment is safe and orderly.
Navigate to the Seeds Page
Click Seeds in the page navigation to open the Seeds workspace.
Understanding the Seeds Page
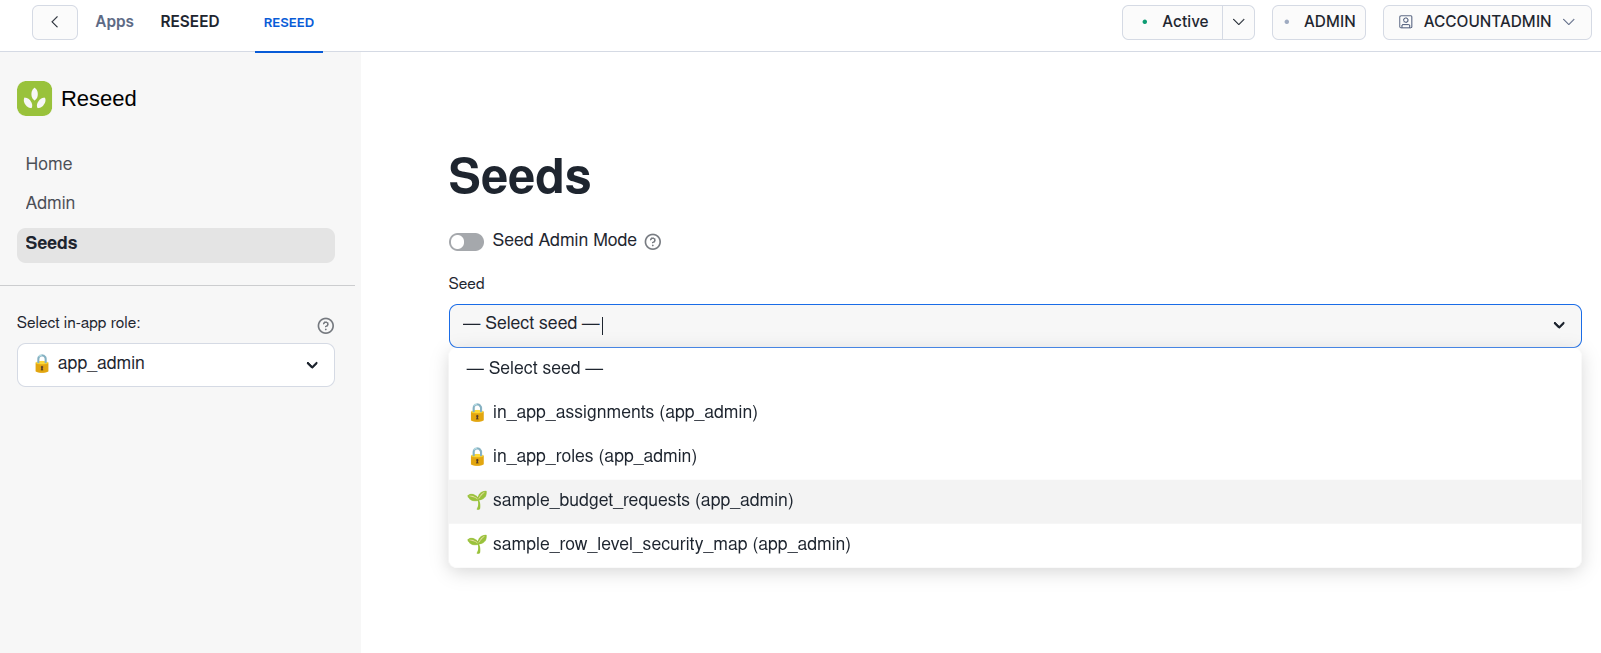
The Seeds page has a context panel at the top with two key elements:
- Seed Admin Mode toggle — Available if you're an
app_adminor have Seed Admin permissions on any Seed. This mode lets you create, edit, and manage Seeds. (Seed Admin permissions will be explained in the Roles & Permissions guide.) - Seed selector — A dropdown showing all Seeds you can interact with based on your permissions.
Reseed's Pre-installed Seeds
Reseed comes installed with four Seeds:
in_app_roles— System-locked (🔒)in_app_assignments— System-locked (🔒)sample_budget_requests— Fully editable (🌱)sample_row_level_security_map— Fully editable (🌱)
Seeds with the lock icon are system-locked and cannot be edited or deleted (though they can be cloned). These exist so app_admin users can quickly load and create many in-app roles and assignments by uploading CSV files instead of creating each role and assignment individually in the UI. The bulk import process is covered in a separate guide.
Seeds with the sprout icon are sample Seeds that you're free to edit or delete. These are single-role Seeds, meaning only the owner can access them. The sample Seeds that come with Reseed (sample_budget_requests and sample_row_level_security_map) are single-role Seeds owned by app_admin. We highly recommend cloning them rather than editing or deleting the originals, so you can reference them in the future.
Clone a Seed
Recommended: Cloning a sample seed is the best way to learn Reseed. Each tab has helper text and expandable sections with examples you can copy and paste.
- Toggle on Seed Admin Mode at the top of the page.
- Select a sample seed (e.g.,
sample_budget_requests) from the Seed selector. - Click Clone.
- Give the cloned seed a new unique name.
- Explore the tabs to see all available options—column config, validation rules, access permissions, etc.
- Click Create Seed.
Cloning a sample seed is the best way to learn Reseed. Each tab has helper text and expandable sections with examples you can copy and paste.
Create from a Sample File
If you have a sample spreadsheet file, Reseed can analyze it and auto-generate column definitions:
- Toggle on Seed Admin Mode at the top of the page.
- Click New Seed.
- Give your Seed a name (e.g., "Budget Requests").
- Click Import from File and select a sample spreadsheet.
- Reseed will analyze the file and auto-generate column definitions.
- Review and adjust the column settings, then click Create Seed.
Reseed can import from Excel (.xlsx), CSV (.csv), and Google Sheets exports. When importing Excel files, you can choose which worksheet and cell range to import.
Create from Scratch
You can also create a Seed manually by defining columns and rules yourself:
- Toggle on Seed Admin Mode at the top of the page.
- Click New Seed.
- Give your Seed a name.
- Add columns one by one, specifying:
- Column name
- Data type (Text, Number, Date, Boolean)
- Whether it's required or optional
- Validation rules (see Validation Rules guide)
- Configure access permissions to determine which in-app roles can upload to or view this Seed.
- Click Create Seed.
Once you've created a Seed, you can start uploading files to it. See the Uploading Files guide for step-by-step instructions.